Wednesday, February 26, 2014

Easter Baking: Kulich from Russia


I have just started my Easter baking experiments, and though this might seem a little early, the supermarkets have already beaten me by several weeks. The supermarket shelves are now full of hot cross buns, chocolate eggs, rabbits; no doubt they are hoping that whatever we buy now we will have eaten well before Easter and will therefore have to go back and buy some more.

If you were looking for something original to bake, like those strange brownies with halved Cadbury cream eggs embedded in them, then click away now, as I have started with the very traditional Russian Kulich bread.

My inspiration for this came about from a wish to take part in Chris's monthly Bloggers Around the World blog challenge, which to coincide with the 2014 Winter Olympics had settled on Russia for the February challenge. It is many years since I went to Russia and my only happy memory of the food there was the sweet breakfasts breads that were served in very short supply each morning. In the mid 1980s package holidays to the Soviet Union were very popular. I went in 1985 when the Union was marking 40 years since the end of World War II, Mikhail Gorbachev had not long been in power.

I did a three city break to Moscow, Leningrad and Kiev. Much has changed since then, it was pre Chernobyl, and well before the break up of the Soviet Union. Kiev was the one place I enjoyed, everywhere else was so very grey. Here is a market we found in Kiev where vegetables were on display in almost military order.
These ladies only sold potatoes
Headscarves and white coats seemed essential

We did all of the usual things, filed passed Lenin in his tomb and I had my hands yanked out of my pockets by a young soldier who clearly thought it disrespectful, though I was just trying to keep warm at the time. We watched a man screech his car to a halt so he could jump out and grab a cabbage off the road that had just fallen off a cart full of cabbages. We were taken to a very smelly circus and a very dull ballet but it was really everything I was expecting.

But I did enjoy those breakfast breads, so in memory of those I am baking a Russian Easter bread called kulich which is very like a panettone in texture and is likewise studded with glace fruits. I have some rather musty copies of the Time-life Foods of the World series, including 'The Cooking of Russia' which was published in 1969. The recipe for kulich in this Time-Life book calls for 10 egg yolks which I decided was too extravagant right now as my chickens are only just starting to get back into lay and that was about as many eggs as I collect in a whole week at the moment.

But the book is full of cultural information and if nothing else the cover is very apt for this post as it shows the traditional Ukranian decoration of Easter eggs. The Kulich breads were taken to church to be blessed and would form part of an Easter feast served with paskha, a mixture of soft cheese enriched with cream, vanilla, candied fruits, egg yolks and nuts.

The kulich cakes should be baked in tall tins, 12 inches (30cm) high which I did not have so I attempted to give a little more height to my cakes by putting a collar of baking parchment around the tin.


 The recipe I settled on was from Paul Hollywoods '100 Great Breads' but with a few tweaks to incorporate the flavourings in the Time-Life recipe. It makes 2 loaves using tins of  approx 15cm diameter.

500g strong plain flour
1 level tsp salt
75g caster sugar
75g butter
1 tsp instant dry yeast
4 eggs beaten
100g raisins soaked in a few tablespoons of rum
pinch of saffron threads
100g mixed chopped candied.glace fruit (citrus peels, cherries, angelica, glace fruits)
75g nibbed or pin almonds
1/4 tsp powdered cardamom
enough milk to make a soft dough ~ 250ml
  • make a ' pre-ferment' by mixing the dry yeast, 100g of the flour and 100ml of milk and leave to rise in a warm place of 1-2 hours. The dough should be rising and looking 'active'.
  • infuse the saffron in about 100 ml of the milk, warmed, and leave for about ten minutes.
  • in a large bowl mix the rest of the flour, salt, sugar, cardamom and rub in the butter.
  • now add the pre-ferment, eggs and saffron milk to the bowl and start to bring the dough together.
  • add additional milk to produce a soft but not sticky dough.
  • knead the dough until it feels elastic and takes on a smoother appearance. This can be achieved by several very short kneads each followed by rests of about 10-15 minutes should you find dough kneading hard work or just annoying.
  • leave the dough, covered, to rise until double in size.
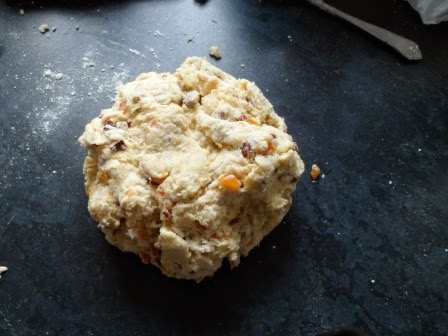
  • now knead in the raisins, chopped glace/candied fruits  and almonds. This can be tricky as the pieces of fruit jump out all over the place. Just get as even a distribution as you can and leave the dough to rise again for an hour.
  • divide the dough in two and shape into balls before placing in the lined tins.
  • cover and leave to rise until double in size.
  • bake initially at 200c for approx 30 mins until the loaves have taken on a good colour and then turn the oven temperature down to 180c to finish the baking (another 20-30 minutes depending on the size of the tins). Use your judgement here and if the loaves are darkening too much turn your oven down again or cover the tops of the loaves with parchment paper. If you have used smaller tins the baking time may be less.
  • the loaves are cooked when a hollow sound comes from tapping the base of the loaf. Turn the loaves out carefully from the tins to do this test as an under-baked loaf can easily collapse and make the crumb 'heavy' if handled roughly before the loaf has fully baked.
  • Once baked carefully turn out to cool on a rack
 
The cooled loaves are often decorated with a lemon flavoured glace icing and decorated with coloured sugar strands.
I just decorated mine with some traditional eggs which my husband brought back from a visit to Kiev a few years ago.

To see what other 'Russian' entries have been cooked up check back to Chris blog cooking around the world

Tuesday, February 25, 2014

We Should Cocoa Goes Random: William Curley's Chocolate Fig Cakes

This month Choclette's  We Should Cocoa blog challenge has teamed up with Dom's  blog challenge Random Recipes to create a joint challenge: Something Random with Chocolate.

From the three chocolate centric books I pulled off the shelf the winner was William Curley's inspirational book, Couture Chocolate.


This is a beautiful book with a mixture of recipes for both chocolates and patisserie. Some of the recipes are very ambitious, but others like the 'Chocolate Fig loaves' I made, are quite straight forward.


You may find you have to be a little flexible over the equipment you use or some of the more specialist ingredients that may be hard to source. I have a lot of baking forms and moulds in my cupboard but I do not own the one this recipe asked for; a mini loaf silicone form that has 25 cells for 8x3x3cm loaves. I looked on the internet and you can purchase them but not at a price I wanted to pay so I made do with four small loaves and adjusted the cooking time for a longer bake. I also did not have the whole hazelnuts that are used to garnish the top of the loaves so I swapped those for pecans, which I prefer anyway.

Quite a few recipes have multi-stages that need planning such as the soaking of the figs in red wine and spices overnight for this recipe, so read through carefully before you commit.

Still the results have been worth the effort every time I have used this book and here are the loaves sliced through and ready to eat:


I will apologise now for not reproducing the recipe but these are quite unique recipes and out of respect to the authors I do think it is unreasonable to type them out with minor changes to simply comply with copyright.

Nov 2105 Update The full recipe has now been published here: wild at heart

It is a good book and I would commend it to anyone with a love of chocolate work. In May 2014 William and Suzue Curly publish their Patisserie book which should be an excellent reference work judging by the quality of their Couture Chocolate book.

Only a few days before I baked my loaves Diane Henry published a recipe for Chocolate, hazelnut and fig loaves that looks just as moreish and you can find the recipe online at the Telegraph Food and Drink. Again the figs are soaked in alcohol overnight.

February is looking sweet, if rather wet and blustery.


Thursday, February 13, 2014

Pecan, Orange, Cardamom & Maple Butter Scones - Valentines Treat


I have a bit of a passion for scones so no surprise that my thoughts on Valentine's baking quickly settled on this homely, but perfect at any time treat. The modest scone always reliable, no fair weather 'bake' that yoyos in and out of fashion, a stalwart of British baking. So perfect to celebrate the warmth and comfort of sharing time with a loved one. But to mark the occasion I am spicing up the ingredients by popping in some warming cardamom, a spice with a reputation for being an aphrodisiac and some candied pecans, regularly described as 'heart friendly' for their cholesterol lowering properties, and orange zest another ingredient that is being looked at for its cholesterol lowering properties. And finally because butter or cream are almost obligatory to serve with a scone we are gilding the lily with some fantastic maple butter from the lovely people at Moose Maple Butter. This is a simple, but delicious blend of fresh butter and pure maple syrup.


I have quite a soft spot for anything 'moose' related so I have to admit the packaging on this one had me smitten before I had tried the product but I am delighted with the butter as well as the pot! I have quite a few moose shaped cookie cutters in my collection and had to see if I could use one here. So not perfect, but quite cheeky - moose shaped scone :

Scones always taste best when freshly baked but they can be popped into an oven for a couple of minutes to refresh if you are eating them the next day. I have also had success with keeping unbaked scones in the fridge for several hours. They go into the fridge on the baking tray, but are not glazed, and so long as they are covered to stop drying this allows the prep to be done well before the freshly baked scones are needed.

I have also heard of frequent scone bakers who keep bulk amounts of the prepared dry ingredients with the butter already rubbed-in, stored in tubs in their freezer.  That way small amounts can be removed, whatever flavourings added, and then enough milk/egg stirred in to mix up the dough.

The pecans in these scones were lightly candied first and this is not essential but enhances the pecan flavour and texture. You could also just lightly toast the nuts first but watch them carefully as pecans turn from nearly done to burnt cinders in the blink of an eye.

My method for candying pecans, walnuts or almonds is to lightly spritz the nuts with a clear alcohol like kirsch or schnapps, or vodka and then sprinkle lightly with icing sugar, turning the nuts over as the sugar is sprinkle over them with a small sieve (about 20g sugar per 250g of nuts). The nuts are then placed in a single layer on a non stick or lined baking tray and baked in an oven preheated to 160C for about 10-12 minutes. The baked nuts will have a light sugar glaze  and a nice crisp texture and toasty flavour.


The recipe

Ingredients
500g plain flour
20g baking powder
1/2tsp ground cardamom
50g caster sugar (or 75g if you prefer sweeter scones)
finely grated zest of 1 orange (untreated fruit or washed before zesting)
pinch of salt
75g butter
2 eggs lightly beaten
230 ml of milk (or a milk/yogurt mix)
100g of coarsely chopped candied/toasted pecans

Preheat your oven to 200C.

Line a heavy baking tray (the baking temperature is hot so thin trays often buckle/warp alarmingly).

Method
  • Place the flour, baking powder, caster sugar, grated orange zest and pinch of salt into a mixing bowl.
  • Cut the butter into cubes, add to the flour mixture and using your finger tips blend the butter into the flour until it resembles a crumb like texture.


  • Add the pecans to the bowl, pour in all but about a tablespoon of the beaten egg (keep this portion for glazing) and add about three quarters of the milk. Stir lightly with a fork to bring the mixture together and add as much of the remaining milk as you need to bring together a coherent but not too sticky dough.
  •  You are aiming at a soft dough, if it is resisting forming into a ball then it is too dry and more milk should be added. When you get near to the point of bringing it together into a ball swap the fork for your hands. You should now be able to feel if the dough is too damp or too dry.

  •  Work it in the bowl a little before turning out onto the counter.

  • Only dust as much flour onto the counter as you absolutely need to keep the dough from sticking.

  • Roll or press the dough out with your hands to a thickness of about 3cm/1".
  • Stamp out the scones with a cutter or just divide the dough with a knife.
  • Place the scones onto the prepared baking tray.
  • Take the container that still has the tablespoon of beaten egg and dilute the egg with another tablespoon of milk. Use this to brush the tops of each scone. Just the top, not the sides. Egg on the sides may hamper the scones from rising evenly.
  • Bake in the preheated oven for 12-15 minutes until golden . If you forgot to preheat the oven just keep the scones cool until the oven temperature reaches 200C. Check after ten minutes to see if you need to rotate the baking tray to keep the heat evenly distributed. The baking time will depend on the size of your scones and the oven temperature being maintained. Ovens do vary as to how quickly they reheat each time the oven door is opened. 
  • Place the baked scones on a wire  cooling rack.


Take the maple butter out of the  fridge to soften a little while you are waiting for the scones to cool.

Enjoy the scones while still just warm, thickly spread with Moose Maple Butter, plain butter or a generous layer of clotted cream. Sprinkle with a few extra candied pecans if liked.

I am very grateful to Farrah from Moose Maple Butter for making it possible for me to feature their Maple Butter in this article. The product is going to become more widely available in the UK this year and for further information see Locate the Moose or follow them on Twitter @FarrahMoose. Is it just me or does anyone else read that twitter handle and instantly find them selves thinking of Freddie Mercury singing Bohemian Rhapsody?


Tuesday, February 11, 2014

Cooking My Years: 'Sweets That Have Tempted Me' by Esme Gray Booker, 1959


There are a lot of cook books on my shelves and if I am honest I am slightly embarrassed by my inability to stop adding yet more. I have run out of shelf space and now have them stacked on the floor under the study table, first just one stack and now three.

I need to stop thinking of them as a collection and then it may be easier to 'use them and then lose them'. So while I am working on a new mind set towards my cookbook attachment I am going to try and re-acquaint myself with some of the hidden gems on the shelves and talk about them here.

Having added all of my books to the Library Thing catalogue and those books that I could to the Eat Your Books online catalogue I realised I had quite a continuous run of publications for each year of my life and that journey seems a good one to follow as I explore the favourite and forgotten books on my shelves.

So we find ourselves starting in 1959 with the very odd title 'Sweets That Have Tempted Me' by Esme Gray Booker. 


I find the title odd because 'tempted' rather suggest resisted as well, and that is no advert for your recipes. The cover jacket describes the author as having a background in domestic science and a graduate of Dietetics and Nutrition. I am not sure that someone with that background would today state that 'Pure sweets are good for young and old'. A philosophy that rather brings back memories of the old candy bar commercial  'A Mars a day helps you work rest and play'. She also advocates that 'sweet making ingredients are clean and pleasant to handle (compared with cleaning fish, scraping carrots or snipping those horrid little bits off kidneys)'. I suspect this is someone who generally had help in the kitchen otherwise scraping carrots could never have been near the top of her list of disliked jobs, there would have been so many more onerous kitchen tasks in the 50's surely.

The book is divided into chapters on different types of sweets: Toffee, Pulled Sweets, Boiled Sweets, Jellies, Marzipan, Fudges, Fondants, Truffles, Nougats, Caramels, Medicinal Sweets,and a few notes on candied fruits and crystallising flowers. 

The recipes are brief and in some cases the instructions barely span four or five lines and are quite vague on quantities and sizes. This is the recipe for Dutch Delights and I am guessing her wineglass was quite a bit smaller than mine or this recipe would have made a huge mound of delights:

Using a wine glass of Advocaat, work into it as much sieved icing sugar as it will take, plus 1 tablespoon of ground almonds. Form into small balls and decorate each one with a sliver of blanched almond and a drop of melted bitter chocolate.

It was the fondant section I was most interested in trying as I had not made boiled fondant for a while and it always seems quite a magical process. I now buy this type of fondant sugar by the 1kg pot from a chocolate wholesale supplier and it is not expensive so I cannot really imagine making it regularly but it is always useful to know how to do it yourself. 

Cooked (boiled) Fondant
You start by dissolving 1lb of sugar in a quarter pint of water. Take this step slowly to ensure all the sugar is dissolved before the liquid starts to boil.

  
Bring the syrup to the boil and add 1oz of glucose or one eighth tsp of cream of tartar.


Continue boiling until the syrup reaches 240F. I like to keep a pot of water and a pastry brush on hand to keep rinsing down any crystals of sugar that form on the sides of the pan.


As soon as the syrup is up to temperature quickly pour it out onto a lightly dampened marble slab or heat/scratch resistant work surface.


Let the syrup cool until the surface just starts to wrinkle when pushed with a palette knife or scraper.


You now work the syrup around the slab with a pair of scrapers turning the edges into the centre as you go and working your way around the pool of syrup which will soon start to turn opaque. Once the mixture has set and is cool enough it can be kneaded gently by hand, having lightly oiled your hands first with a flavourless oil. The smooth ball of fondant is then tightly wrapped and left for a day.

The fondant paste can be flavoured in many ways to make sweets, and it can also be used to coat small cakes like fondant fancies, iced finger buns etc though this requires the fondant to be warmed gently with a small amount of dilute sugar syrup to obtain a pouring/dipping consistence.


I chose to make peppermint creams with my fondant so a small amount of good quality peppermint oil was kneaded into the fondant which was then rolled out and cut into shapes and left to dry for a day.


I am going to dip these in a very dark chocolate, 82% cocoa, from the lovely Grenada Chocolate company as the contrast of dark and bitter shell around an intensely sweet and aromatic centre works well. I have a few toys for working with chocolate as it is a big hobby of mine but you do not need them. The chef of Sienna restaurant in Dorset has written a really good blog post: Chocolate Tempering and do read this if you are looking to start making your own chocolates it is a great first read.

I slowly melt the chocolate to 45-50C stirring regularly but carefully, you do not want to trap air bubbles in the chocolate if you can help it.


More solid chocolate is then added to the pot and the temperature is reduced down to 30-31C. Then the temperature is brought up to 31-32C and kept there throughout the dipping process.

Drop the item to be dipped into the pool of chocolate and then flip it over and up and out of the chocolate using a dipping fork (an emergency cheap dipping fork can be produced by snapping the middle tines out of a plastic fork).


Tap the fork very gently to drain off excess chocolate and then carefully place the dipped item onto a lined metal tray.
If you are not getting on with dipping and you have nice flat shapes try just half dipping each one by carefully holding one side edge in your hand and gently inserting into the chocolate before lifting out and allowing excess to drain off.

I had some chocolate transfer sheets to hand so I tried placing these on top of some of the hearts. Be warned that a very pretty looking transfer, if quite softly coloured and with fine lines, will barely show up on the finished chocolate. Only the small solid hearts showed up but the transfer had quite a lot more line detail on it which would have stood out better on white chocolate.

Leave the dipped items to set in a slightly cool room but not too cold or you can get condensation setting on the surface.

Keep in a sealed container.


Enjoy as these are so much nicer than the after dinners ones served by so many restaurants.

Sunday, February 9, 2014

Scone of the Month: Cheese Scones with Chilli Jam

Over the coming months I am hoping to show just how versatile home made scones can be and that once you have settled on a reliable base recipe you can add many different flavourings without having to redesign your whole recipe each time.

As we are so close to Valentine's day I am going to start the series with a suitably tweaked savoury scone: 


Heart Shaped Mini Cheese Scones with Cream Cheese and Chilli Jam

I think these would make a perfect pre-dinner nibble or a lovely savoury item on an afternoon tea menu. The heart shaped cutter is totally optional, any mini round or square shaped  scones would be just as delicious.

I have used a Paul Hollywood recipe for some time now to make cheese scones and this comes from his earlier book, 100 Great Breads, published in 2004. I varied the ingredients slightly for these scones by substituting some of the flour with fine cornmeal.

Ingredients:
450g strong white flour (or 500g if not using the fine cornmeal)
50g fine cornmeal/polenta flour
15g white sugar
20g baking powder
75g butter
2 eggs beaten (plus an additional egg for glazing)**
240ml milk
100g grated cheddar cheese
pinch of salt

Pre-heat the oven to 200C, Gas mark 7 and line a heavy baking tray with greaseproof/parchment paper.
  • Place the flour, cornmeal, baking powder, sugar and pinch of salt into a bowl.
  • Rub the butter into the flour to give a fine crumb texture.
  • Stir in the grated cheese.
  • Add the beaten egg and the milk and bring the dough together stirring initially with a fork/spoon and finally with your hands.
  • Turn the dough out onto a floured surface and knead very lightly to form a smooth ball of dough. The dough should have a soft but not sticky texture.
  • Gently press or roll the dough out to a thickness of approximately 2.5cm/1" for mini scones and  3.5cm/1.5" for larger scones.
  • Using a pastry cutter stamp out the scones placing them onto the lined baking tray.
  • Any off-cuts of dough can be gently reformed into a ball and rolled out again.
  • **Now if you would like shiny golden scones you would brush each one with a beaten egg but this always seems very wasteful of an egg. My usual trick is to keep the bowl I used to beat the eggs in handy, there is nearly always a little egg left stuck to the sides. Add a couple of tablespoons of milk and stir the bowl well to incorporate any egg that was left and use this as the egg wash. They will not be as shiny as with a pure egg wash but they will be fine.
  • Allow the scones to rest for about 10 minutes before baking in a hot (200c) oven.
  • Small scones will take about 10 minutes and larger ones about 15 minutes.  Much depends on your oven and how large or small you have made the scones. You may need to turn the tray around half way through baking to even out the heat distribution.

These cheese scones are delicious just served with butter but this time I want to serve them with a layer of low fat cream cheese topped off with chilli jam.


 You can either buy your favourite make of chilli jam or make your own, as it really quite straight forward.


The chilli jam/jelly I used was made from a recipe I found on Nigella Lawson's web site and it was incredibly quick to make, although I only made a quarter of the recipe as I only had a few fresh chillies to hand. The ingredients are just chilli peppers, red peppers, jam sugar and cider vinegar, really simple. Please hop over to the linked recipe for full instructions. Below I have noted some of the slight modifications I made


I am no chilli head so I actually removed all of the seeds from the chilli peppers whereas the recipe has you leave them in.  I just used chilli peppers and no bell peppers as my home grown chillies are very mild and quite fleshly. I also substituted  wine vinegar for cider vinegar simply because that was the vinegar I had in store. The 'jam sugar' that the recipes calls for can be substitued with ordianry sugar and an appropriate amount of pectin powder/bottle pectin just check the ratio of pectin to sugar specified on the packaging. I really do not think you will get away with plain sugar as the chilli peppers will not have enough pectin on their own to set the jelly.

I think I added quite a generous amount of pectin as my jelly went to a firm set very quickly so I poured the jam into the jar almost straight away rather than waiting the 40 minutes mentioned in the recipe. This is a picture of the jelly being tested for the set point, the surface of the jelly wrinkles very quickly when pushed with a spoon.


The jelly was so good I found myself eating it by the spoonful so next time I really must make a larger batch!